




Axkid Minikid Core
Axkid Minikid Core
SKU:22240040
Clothing Prem to 18 Months
| Size | Age Guide | Weight | Height |
|---|---|---|---|
| Premature | Premature or Small Newborn | Up to 4Kg | Up to 55cm |
| Newborn | 0-3 months | 4-6Kg | Up to 62cm |
| 3 Month | 3-6 months | 6-8Kg | Up to 68cm |
| 6 Month | 6-12 Month | 8-10Kg | Up to 76cm |
| 12 Month | 12-18 Month | 10-12Kg | Up to 84cm |
| 18 Month | 18-24 Month | 12-14Kg | Up to 92cm |
Clothing 2 to 6 Years
| Size | Age Guide | Height | Chest | Waist | Hip |
|---|---|---|---|---|---|
| 2 Year | 2-3 Years | Up to 100 cm | 56 | 51 | 58 |
| 3 Year | 3-4 Years | Up to 105 cm | 58 | 53 | 60 |
| 4 Year | 4-5 Years | Up to 110 cm | 60 | 55 | 62 |
| 5 Year | 5-6 Years | Up to 115 cm | 62 | 57 | 64 |
| 6 Year | 6-7 Years | Up to 120 cm | 64 | 59 | 66 |
Beanie Size Guide
| Size | Head Circumference | Age Guide |
|---|---|---|
| Premature | 31-35 cm | Premature or Small Newborn |
| Newborn | 35-40 cm | Newborn |
| Small | 40-43 cm | 3-6 Months |
| Medium | 43-47 cm | 6-18 Months |
| Large | 47-52 cm | 18-3 Years |
Sunhat Size Guide
| Size | Head Circumference | Age Guide |
|---|---|---|
| Newborn | 37-40 cm | Newborn |
| Small | 40-43 cm | 3-6 Months |
| Medium | 43-46 cm | 6-12 Months |
| Large | 46-49 cm | 12-24 Months |
| Xtra Large | 49-54 cm | 2-4 Years |
Sleep Pods Size Guide
| Size | Weight | Age Guide | Measurement(Back to Hem) |
|---|---|---|---|
| Newborn | 0-6 kgs | 0-3 Months | 60.5 cm |
| Small | 0-8 kgs | 3-6 Months | 66 cm |
Booties Size Guide
| Size | Age Guide |
|---|---|
| Newborn | 0-3 Months |
| Small | 3-6 Months |
| Medium | 6-12 Months |
| Large | 12-18 Months |
Pretty Brave Baby
| Foot Length (mm) | Insole Length (mm) | EU | UK | Age | INT |
|---|---|---|---|---|---|
| 95-104 | 110 | 16/17 | 2 | 0-6m | S |
| 104-114 | 118 | 18 | 3 | 6-12m | M |
| 114-123 | 127 | 19/20 | 4.5 | 12-18m | L |
| 123-137 | 142 | 21/22 | 5.5 | 16-22m | XL |
Pretty Brave 1st Walker
| Foot Length (mm) | Insole Length (mm) | EU | UK | Age |
|---|---|---|---|---|
| 114-120 | 125-128 | 19 | 3 | 1 yr |
| 120-126 | 132-135 | 20 | 3.5 | 1-2 yrs |
| 126-132 | 138.5-141.5 | 21 | 4.5 | 1-2 yrs |
| 132-138 | 145-148.5 | 22 | 5 | 2 yrs |
Crywolf Swim Nappy
| Size | Length (waist to crotch) | Crotch Width (side to side) |
|---|---|---|
| 0-1 yr | 1-2 yrs | |
| 37 | 38 | |
| 14.5 | 15.5 |
Crywolf Rash Suit
| Size | Length (back neck to crotch) | Chest (arm to arm) | Waist (side to side) | Sleeve (neck to cuff) | Neck Opening(diameter) |
|---|---|---|---|---|---|
| 6-12 Months | 1 yr | 2 yrs | 3 yrs | ||
| 40 | 42 | 44 | 46 | ||
| 25 | 26 | 27 | 28 | ||
| 24 | 25 | 26 | 27 | ||
| 30 | 31.5 | 33 | 34.5 | ||
| 13.25 | 13.25 | 13.8 | 14.3 |
Low stock
Couldn't load pickup availability
Overview
Overview
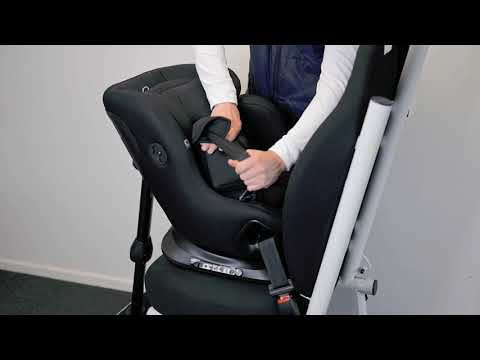
The Axkid Minikid Core in Grey is a premium extended rear-facing car seat designed to keep your child safe from newborn up to approximately 7 years (40–125cm, up to 28kg). Swedish Plus Test approved and certified to UN R129, it delivers exceptional protection while making everyday travel simple for families.
Designed with a compact footprint, the Minikid Core fits a wide range of vehicles and installs securely using your vehicle's seat belt, no tether straps required. With an adjustable headrest, comfortable recline positions and a spacious seat, it grows with your child while providing comfort on every journey.
What's Included
What's Included
Key Features
Key Features
Technical Specification
Technical Specification
User Guide
User Guide
Delivery and Returns
Delivery and Returns
- Delivery: Free within NZ on orders over $130 (excluding bulky items) or $8 standard shipping
- Returns: Accepted within 14 days of receipt with proof of purchase
- Some items are excluded from returns including sale items, hardware, car seats, prams, monitors and personal items - please click here for the full list.
Share this product
Recently Viewed Products
Related Blogs

Car Safety for Littlies
Car seats and safety tips for parents When you become a parent, keeping your child safe is your most important job, and safety in the car is particularly important. Most of us drive so regularly that we forget how dangerous cars can be – but car crashes are one of the most common causes of injury and death for children. Car seats are now more sophisticated and high-tech than ever before, which is good news when it comes to keeping your children safe. But as seats have changed, so have the rules and guidelines about installation and use. This is where it gets confusing – many parents are not sure about car restraint laws or best practices. You have to choose from a huge range of car seats, install them properly, then work out how to get your brand-new baby strapped in safely. It can be a minefield, so it’s a good idea to work out what you’re doing well ahead of time – you don’t want to be googling info on the way to the hospital. Here’s our guide to car safety for young kids in NZ. Car seat law in New Zealand Children are far smaller than adults, and they’re built differently as well. That’s why car seats are essential – they protect delicate bodies in case of an accident. Seat belts are designed to sit in the right place on adult bodies, but not on lighter, shorter children. They can actually cause damage to children’s organs in a crash. That’s why the law in New Zealand is that all children travelling in a car must be in a child restraint until they turn 7. If there’s a child restraint in the car, they must use it until they turn 8. . The seat must be installed correctly, and the child must be secured properly. You should continue to use a car seat or booster seat until your child reaches 148 cm tall.- at that height the vehicle safety belts will fit correctly. Safety tips for little ones Car seats are key, but there are other car safety considerations as well, especially as your child gets older. It’s important to never leave your baby or child in the car alone – even if you’re only leaving for a few minutes. Here’s what to remember: Install baby and child seats in the back seat, as this is the safest place – front airbags can be deadly to small children in a crash. Put your child in his seat and secure the straps every single time – even a short journey could be dangerous. Never leave children in the car alone, even for a short time – babies and small children can overheat and dehydrate very quickly if left in a car. In warm weather, make sure your car is air-conditioned, or keep a window open to provide airflow. As your child gets older, teach him to get out of the car on the footpath side if possible – if not, make sure he waits for an adult to get him out of the car. If you’re taking multiple children out of the car, teach them to keep a hand on the side of the vehicle while they wait. Don’t let children play with car doors or controls unsupervised. Activate child safety locks while driving if your car has them. The right car seat at any age When you look at the huge range of options, car seats can seem overwhelming. What’s right at each age? How do you install them correctly? How do you know when your child is ready for the next type of seat? The good news is, there’s actually a fairly simple progression of seat types for different ages – from 0-2 most babies should be in a rear-facing car seat, from two to around four or five they should be in a front-facing restraint, and after that, they should stay in a booster seat until they’re 148cm tall. Read our full guide to car seats here Rear-facing restraints Rear-facing child restraints are the safest option for small babies and toddlers. Because small children have large heads in proportion to their body size, a crash in a forward-facing seat can cause devastating damage to the neck and spine – so try to keep your child rear-facing for as long as possible. Experts recommend facing your baby backwards until she’s at least two, so if she outgrows her seat before then, you could think about buying a rear-facing seat with a higher height or weight limit. You can choose to use a rear-facing capsule-style seat for your new-born, or go straight to a convertible seat that takes you from infant to pre-school – or further. Rear-facing tips: Buy or rent an appropriate seat well before your baby is born – hospitals won’t let you leave without a car seat for your newborn. Read the instructions carefully and install the seat correctly – many retailers will help with installation or check to make sure your seat is properly fitted. Put the car seat in the back seat of the car if possible – front seat airbags can be seriously dangerous to babies and small children. If your vehicle doesn’t have a back seat, a rear-facing seat can be installed in the front passenger seat – but ask your mechanic to deactivate the airbag or move the seat back as far as you can. Don’t let small babies sleep in their car seats if you’re not driving, as the upright position can cause breathing difficulties in some cases. Always use a seat that’s appropriate to the weight and height of your baby – if you start with a capsule, you’ll probably need to switch to another rear-facing seat when your child is around six months old. Forward-facing car seats When your child outgrows his rear-facing position, you need to turn his seat around. You can tell he’s ready for the switch when the top of his head reaches the top of the car seat or the marked height limit, or when your baby’s weight reaches the limit for your particular seat. Forward-facing tips: Install the seat properly – don’t forget to use the tether strap if the seat needs one. Put the car seat in the back seat of the car unless there’s absolutely no other option – front seat airbags can be seriously dangerous to babies and small children. Always secure your child in the seat correctly – straps should sit flat and tight, and the central clip should be pulled up to sit in the centre of the child’s chest. Booster seats Unlike car seats, boosters don’t have a harness to hold the child in place – they just lift her into the right position to use the car’s seat belt. Your child is ready for a booster when her eye level reaches the top of her car seat, or when she reaches the recommended weight for your model of the seat. If your child grows out of her seat and you still want the safety of a child restraint, you can look for a seat with a higher maximum weight. Children should use a booster until they’re tall enough to use the car’s safety belts on their own – the belt should cross over the shoulder, rather than the neck, their legs should bend over the edge of the seat while their back reaches the seat, and the lap belt should cross their pelvis and thighs. Most children can stop using a booster at around 12 – or 148cm tall. Booster tips: Look for a booster seat with a belt guide to help position the seat belt on your child’s shoulder, rather than close to the neck Only use a booster seat with a full seat belt – lap belts will not hold them safely. Keeping your babies safe It may sound like a lot to learn, but keeping your children safe in the car is pretty straightforward once you get started. Just remember – try to keep them rear-facing and in a five-point harness for as long as you can. And if you’re confused about choosing the right car seat or installing it properly, talk to our expert team – we’re always happy to help.
Learn more
Tips & Tricks - Cleaning your Carseat
How to Keep Your Car Seat Clean (and Looking Like New!) Parents and caregivers know that washing can quickly take over your life when you’ve got little ones around – especially when it comes to car seats! Kids, being kids, seem to have a knack for turning a spotless, brand-new car seat into a treasure trove of crumbs, spills, and, well, the occasional bodily fluid. While it would be ideal to ban all food and drink from the car seat (let's face it, that’s easier said than done!), prevention is key. A full-sleeved bib worn over the straps can help catch any messes before they even get the chance to make a mark. If a major mess happens (think: vomit, diaper leaks, or spilled drinks), the sooner you clean it up, the better. In between those big cleans, a quick vacuum once a week can keep things under control and prevent crumbs from piling up. For extra protection, consider using protective car seat covers or mats to catch any messes that could cause long-term damage to your car. Here are some simple steps to keep your car seat looking fresh and clean: 1. Vacuum Your Seat Give your seat a quick shake to loosen any crumbs or debris, then vacuum up the mess before removing the car seat for a deeper clean. This will stop any stray bits from making a mess as you go! 2. Remove and Wash the Car Seat Covers Start by checking your car seat’s instruction manual for cleaning guidelines. Many car seat covers are machine washable, but some may require hand washing. Be sure to note any special instructions about detergent, water temperature, or removable parts. Pro tip: Take a few photos or a video as you remove the covers. This can be a lifesaver when it's time to reassemble! A gentle, mild detergent or just soap and water are typically your best bet. Avoid bleach or harsh chemicals, as these can damage or weaken the fabric. When it comes to drying, line drying is your safest option, as most car seat covers can't go in the dryer. Give them plenty of time to air out and dry completely. 3. Clean the Harness & Straps Use a non-abrasive cloth and warm water to spot clean the harness and straps. Follow your manual’s instructions, as some manufacturers allow using soapy water, while others may not. 4. Clean the Buckles Buckles are critical for keeping your child safe, so avoid submerging them in water or using any lubricants. Instead, spot clean them with warm water and a soft cloth, keeping them free from soap or cleaning products. 5. Clean the Shell Vacuum the car seat shell to catch any loose bits, then use an old toothbrush or cotton bud to get into those tricky nooks and crannies. A damp cloth can help wipe down any sticky or dirty areas. Make sure the shell is fully dry before putting everything back together. 6. Reassemble Your Seat If you took photos or videos while disassembling, now is the time to refer back to them! Check your manual to ensure all parts are correctly reassembled, and give the harness and buckles a final check to ensure they’re securely fitted and ready for your little one. Note: This guide is intended to help with your car seat cleaning routine, but always follow the manufacturer’s specific instructions in your car seat manual to keep your warranty intact.
Learn more
How to Store a Car Seat Between Children
As parents, we often find ourselves marvelling at how quickly our little ones grow. One day, they're nestled securely in their capsule and before we know it, they're moving on to a convertible car seat. If you're planning to store a capsule for a future sibling, you’ll want to ensure it remains in excellent condition, ready to protect your next bub. One of the main concerns during storage is preventing mould, which can be harmful to your baby's health and damaging to the car seat. Also, be aware that car seats do have an expiration date. Check this before packing the seat away. Here are some storage tips to help keep a capsule clean and mould-free: 1. First Step - Clean Thoroughly Before you even think about storing the car seat, it’s crucial to clean it thoroughly. Mould thrives in dirty, damp environments, so you want to ensure the seat is as clean as possible. Remove Fabric Covers : Start by removing any fabric covers, cushions, and padding that can be taken off. Many of these can be machine-washed. Check the manufacturer’s instructions for your seat. Wipe Down You can spot-clean your harness and straps with warm water and a non-abrasive cloth (ensure you follow your instruction manual for advice as some manufacturers allow the use of soapy warm water). Vacuum Pay close attention to crevices that can accumulate crumbs, sand and dirt. Dry Completely : After washing, make sure that every part of the seat is completely dry before storage. Leaving any moisture behind is an invitation for mould growth. Some drying time in the sun is great as ultraviolet light is a natural disinfectant. Read More about cleaning a car seat here. 2. Choose the Right Storage Environment Where you store the car seat is as important as how you clean it. Cool, Dry Place : The storage area should be cool and dry. Avoid basements, garages, or attics if they’re prone to humidity, which can encourage mould growth. A closet or spare room inside your home, where temperatures are more regulated, is ideal. Elevated Position : Store the car seat off the ground to avoid potential contact with dampness. Packaging : Seal the seat in a plastic bag and then in a cardboard box for protective storage. If you’ve kept the original box the seat came in, that’s ideal. Ensure you have all the pieces together including the manual, any infant inserts and even the car seat adapters for your stroller. However you may want to store the fabric covers separately in the linen cupboard if you have one. 3. Check Periodically It’s a good idea to regularly check on the car seat during storage to make sure there’s no exposure to damp or pests. 4. Pre-Use Inspection Before you use the car seat for your next child, inspect it thoroughly. Check for any signs of damage, mould, or mildew. Give it another clean if necessary, and ensure that all components are still in good working order. Final Thoughts Storing a capsule car seat between children can save you money and reduce waste, but it requires careful cleaning and storage to keep it in top condition. Don’t forget to get it out of storage and do that pre-use check nice and early so you have everything sorted well before the new bub arrives.
Learn more
Car Seat Expiries - What You Need to Know
Car seats are one of the most important safety products you'll ever use for your child. Did you know they typically have a lifespan of 6 – 10 years, depending on the brand and model? While it might seem surprising that something so solid and well-built would have an expiry date, there are good reasons behind it. Why Do Car Seats Expire? Wear and Tear: Over time, materials like plastic can become brittle and weaken, especially after sitting in a hot vehicle exposed to harsh UV rays. Even if a seat looks fine on the outside, internal components may have deteriorated, and this could potentially compromise the seat's effectiveness. Changing Safety Standards: Car seat technology and safety regulations evolve. An expired seat may not meet the latest standards or be compatible with newer vehicle designs. Considering a Second-Hand Car Seat? If you're thinking about buying - or accepting - a second-hand car seat, checking the expiry date should be your first step. Additionally, it’s important to: Ensure it hasn’t been in a crash: Car seats involved in an accident may have hidden damage and should not be reused. Make sure all parts are included: Without the original manual and components, proper installation may not be possible. The seat must also have its original certification label to certify it complies with one of New Zealand’s approved safety standards - NZ/AU, ECE, or US displaying yellow S sticker. Learn more Where to Find Expiry Information The expiry will either be from Date of Manufacture or from Date of Purchase (with a receipt) – depending on the brand. To check your seat, check the car seat expiry list here. Car seats generally have a label or stamped date on the shell that indicates the date of manufacture. This example above shows the date embossed on the shell – Date of Manufacture 4 June 2022 In this example the date is found stamped on the harness clips - Date of Manufacture August 2023 In this case it’s a sticker – Date of Manufacture 18 July 2024 The Bottom Line Your child’s safety is too important to leave to chance. Always check a car seat’s expiry before use - especially if you’re considering a second-hand one. When in doubt, it’s best to invest in a new, up-to-date seat that meets all current safety standards.
Learn more