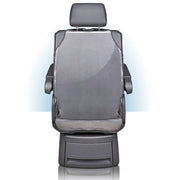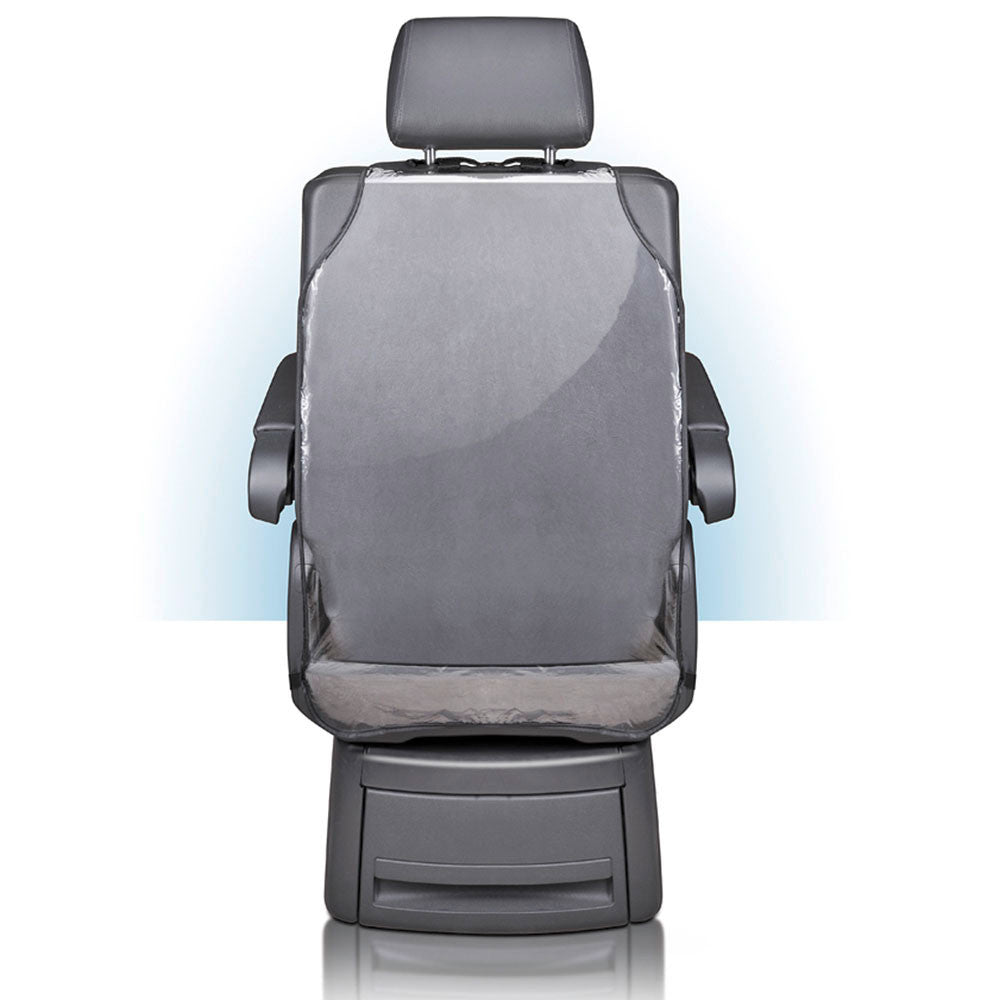
Reer Car Seat Cover
Reer Car Seat Cover
SKU:74506
Clothing Prem to 18 Months
| Size | Age Guide | Weight | Height |
|---|---|---|---|
| Premature | Premature or Small Newborn | Up to 4Kg | Up to 55cm |
| Newborn | 0-3 months | 4-6Kg | Up to 62cm |
| 3 Month | 3-6 months | 6-8Kg | Up to 68cm |
| 6 Month | 6-12 Month | 8-10Kg | Up to 76cm |
| 12 Month | 12-18 Month | 10-12Kg | Up to 84cm |
| 18 Month | 18-24 Month | 12-14Kg | Up to 92cm |
Clothing 2 to 6 Years
| Size | Age Guide | Height | Chest | Waist | Hip |
|---|---|---|---|---|---|
| 2 Year | 2-3 Years | Up to 100 cm | 56 | 51 | 58 |
| 3 Year | 3-4 Years | Up to 105 cm | 58 | 53 | 60 |
| 4 Year | 4-5 Years | Up to 110 cm | 60 | 55 | 62 |
| 5 Year | 5-6 Years | Up to 115 cm | 62 | 57 | 64 |
| 6 Year | 6-7 Years | Up to 120 cm | 64 | 59 | 66 |
Beanie Size Guide
| Size | Head Circumference | Age Guide |
|---|---|---|
| Premature | 31-35 cm | Premature or Small Newborn |
| Newborn | 35-40 cm | Newborn |
| Small | 40-43 cm | 3-6 Months |
| Medium | 43-47 cm | 6-18 Months |
| Large | 47-52 cm | 18-3 Years |
Sunhat Size Guide
| Size | Head Circumference | Age Guide |
|---|---|---|
| Newborn | 37-40 cm | Newborn |
| Small | 40-43 cm | 3-6 Months |
| Medium | 43-46 cm | 6-12 Months |
| Large | 46-49 cm | 12-24 Months |
| Xtra Large | 49-54 cm | 2-4 Years |
Sleep Pods Size Guide
| Size | Weight | Age Guide | Measurement(Back to Hem) |
|---|---|---|---|
| Newborn | 0-6 kgs | 0-3 Months | 60.5 cm |
| Small | 0-8 kgs | 3-6 Months | 66 cm |
Booties Size Guide
| Size | Age Guide |
|---|---|
| Newborn | 0-3 Months |
| Small | 3-6 Months |
| Medium | 6-12 Months |
| Large | 12-18 Months |
Pretty Brave Baby
| Foot Length (mm) | Insole Length (mm) | EU | UK | Age | INT |
|---|---|---|---|---|---|
| 95-104 | 110 | 16/17 | 2 | 0-6m | S |
| 104-114 | 118 | 18 | 3 | 6-12m | M |
| 114-123 | 127 | 19/20 | 4.5 | 12-18m | L |
| 123-137 | 142 | 21/22 | 5.5 | 16-22m | XL |
Pretty Brave 1st Walker
| Foot Length (mm) | Insole Length (mm) | EU | UK | Age |
|---|---|---|---|---|
| 114-120 | 125-128 | 19 | 3 | 1 yr |
| 120-126 | 132-135 | 20 | 3.5 | 1-2 yrs |
| 126-132 | 138.5-141.5 | 21 | 4.5 | 1-2 yrs |
| 132-138 | 145-148.5 | 22 | 5 | 2 yrs |
Crywolf Swim Nappy
| Size | Length (waist to crotch) | Crotch Width (side to side) |
|---|---|---|
| 0-1 yr | 1-2 yrs | |
| 37 | 38 | |
| 14.5 | 15.5 |
Crywolf Rash Suit
| Size | Length (back neck to crotch) | Chest (arm to arm) | Waist (side to side) | Sleeve (neck to cuff) | Neck Opening(diameter) |
|---|---|---|---|---|---|
| 6-12 Months | 1 yr | 2 yrs | 3 yrs | ||
| 40 | 42 | 44 | 46 | ||
| 25 | 26 | 27 | 28 | ||
| 24 | 25 | 26 | 27 | ||
| 30 | 31.5 | 33 | 34.5 | ||
| 13.25 | 13.25 | 13.8 | 14.3 |
Low stock
Couldn't load pickup availability
Overview
Overview
Features
- simple and convenient fastening to the backseat
- very durable
- washable PVC & nylon material
- free from pollutants and phthalates
Delivery and Returns
Delivery and Returns
- Delivery: Free within NZ on orders over $100 (excluding bulky items) or $8 standard shipping
- Returns: Accepted within 14 days of receipt with proof of purchase
- Some items are excluded from returns including sale items, hardware, car seats, prams, monitors and personal items - please click here for the full list.
Share this product
Recently Viewed Products
Related Blogs

Tips & Tricks - Cleaning your Carseat
How to Keep Your Car Seat Clean (and Looking Like New!) Parents and caregivers know that washing can quickly take over your life when you’ve got little ones around – especially when it comes to car seats! Kids, being kids, seem to have a knack for turning a spotless, brand-new car seat into a treasure trove of crumbs, spills, and, well, the occasional bodily fluid. While it would be ideal to ban all food and drink from the car seat (let's face it, that’s easier said than done!), prevention is key. A full-sleeved bib worn over the straps can help catch any messes before they even get the chance to make a mark. If a major mess happens (think: vomit, diaper leaks, or spilled drinks), the sooner you clean it up, the better. In between those big cleans, a quick vacuum once a week can keep things under control and prevent crumbs from piling up. For extra protection, consider using protective car seat covers or mats to catch any messes that could cause long-term damage to your car. Here are some simple steps to keep your car seat looking fresh and clean: 1. Vacuum Your Seat Give your seat a quick shake to loosen any crumbs or debris, then vacuum up the mess before removing the car seat for a deeper clean. This will stop any stray bits from making a mess as you go! 2. Remove and Wash the Car Seat Covers Start by checking your car seat’s instruction manual for cleaning guidelines. Many car seat covers are machine washable, but some may require hand washing. Be sure to note any special instructions about detergent, water temperature, or removable parts. Pro tip: Take a few photos or a video as you remove the covers. This can be a lifesaver when it's time to reassemble! A gentle, mild detergent or just soap and water are typically your best bet. Avoid bleach or harsh chemicals, as these can damage or weaken the fabric. When it comes to drying, line drying is your safest option, as most car seat covers can't go in the dryer. Give them plenty of time to air out and dry completely. 3. Clean the Harness & Straps Use a non-abrasive cloth and warm water to spot clean the harness and straps. Follow your manual’s instructions, as some manufacturers allow using soapy water, while others may not. 4. Clean the Buckles Buckles are critical for keeping your child safe, so avoid submerging them in water or using any lubricants. Instead, spot clean them with warm water and a soft cloth, keeping them free from soap or cleaning products. 5. Clean the Shell Vacuum the car seat shell to catch any loose bits, then use an old toothbrush or cotton bud to get into those tricky nooks and crannies. A damp cloth can help wipe down any sticky or dirty areas. Make sure the shell is fully dry before putting everything back together. 6. Reassemble Your Seat If you took photos or videos while disassembling, now is the time to refer back to them! Check your manual to ensure all parts are correctly reassembled, and give the harness and buckles a final check to ensure they’re securely fitted and ready for your little one. Note: This guide is intended to help with your car seat cleaning routine, but always follow the manufacturer’s specific instructions in your car seat manual to keep your warranty intact.
Learn more
How to Store a Car Seat Between Children
As parents, we often find ourselves marvelling at how quickly our little ones grow. One day, they're nestled securely in their capsule and before we know it, they're moving on to a convertible car seat. If you're planning to store a capsule for a future sibling, you’ll want to ensure it remains in excellent condition, ready to protect your next bub. One of the main concerns during storage is preventing mould, which can be harmful to your baby's health and damaging to the car seat. Also, be aware that car seats do have an expiration date. Check this before packing the seat away. Here are some storage tips to help keep a capsule clean and mould-free: 1. First Step - Clean Thoroughly Before you even think about storing the car seat, it’s crucial to clean it thoroughly. Mould thrives in dirty, damp environments, so you want to ensure the seat is as clean as possible. Remove Fabric Covers : Start by removing any fabric covers, cushions, and padding that can be taken off. Many of these can be machine-washed. Check the manufacturer’s instructions for your seat. Wipe Down You can spot-clean your harness and straps with warm water and a non-abrasive cloth (ensure you follow your instruction manual for advice as some manufacturers allow the use of soapy warm water). Vacuum Pay close attention to crevices that can accumulate crumbs, sand and dirt. Dry Completely : After washing, make sure that every part of the seat is completely dry before storage. Leaving any moisture behind is an invitation for mould growth. Some drying time in the sun is great as ultraviolet light is a natural disinfectant. Read More about cleaning a car seat here. 2. Choose the Right Storage Environment Where you store the car seat is as important as how you clean it. Cool, Dry Place : The storage area should be cool and dry. Avoid basements, garages, or attics if they’re prone to humidity, which can encourage mould growth. A closet or spare room inside your home, where temperatures are more regulated, is ideal. Elevated Position : Store the car seat off the ground to avoid potential contact with dampness. Packaging : Seal the seat in a plastic bag and then in a cardboard box for protective storage. If you’ve kept the original box the seat came in, that’s ideal. Ensure you have all the pieces together including the manual, any infant inserts and even the car seat adapters for your stroller. However you may want to store the fabric covers separately in the linen cupboard if you have one. 3. Check Periodically It’s a good idea to regularly check on the car seat during storage to make sure there’s no exposure to damp or pests. 4. Pre-Use Inspection Before you use the car seat for your next child, inspect it thoroughly. Check for any signs of damage, mould, or mildew. Give it another clean if necessary, and ensure that all components are still in good working order. Final Thoughts Storing a capsule car seat between children can save you money and reduce waste, but it requires careful cleaning and storage to keep it in top condition. Don’t forget to get it out of storage and do that pre-use check nice and early so you have everything sorted well before the new bub arrives.
Learn more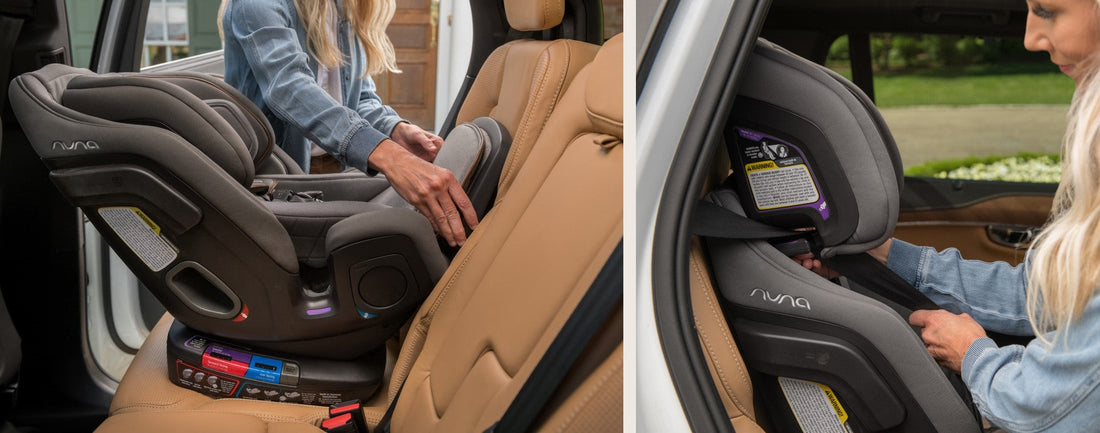
Carseats Standards in New Zealand
Under New Zealand law, the driver is responsible for making sure all children under seven years of age are using a child restraint (car seat) that’s appropriate for their age, size, and development. Keeping your child safe is the number one priority. As a guide, from 0-2yrs, most babies should be in a rear-facing capsule or car seat, from two to around four or five they should be in a front-facing restraint, and after that, they should stay in a booster seat until they’re 148cm tall. Read our full guide to choosing a car seat here New Zealand car seat standards Every car seat that is sold or used in New Zealand has to be manufactured to a standard that complies with our minimum safety standards. You will find the car seat safety standard displayed as a sticker or a label on the shell of your child restraint. This will indicate which safety standard your car seat was manufactured to. When looking at car seats, you may identify a variety of different stickers: 1. The joint Australian, and New Zealand standards. This sticker can be identified as AS/NZS 1754. If you have an Australian standard car seat with this sticker identification it can be bought into New Zealand and used here. 2. The European Standard can be identified by a sticker reading ECE R44/04 or UN R129 and/or i-size. A European standard car seat with a sticker showing these numbers is legal for use within New Zealand. 3. The US standard child restraints can be identified with the code FMVSS 213. Some child restraints that are manufactured to the US standard are approved for use within New Zealand, but it is important to note that not all are. Child restraints that are manufactured to AS/NZ and European standards are independently tested to achieve the certification that allows each car seat to be used within New Zealand. However, car seats that are manufactured to the US standard are self-certified. This is why independent testing of US standard car seats must be run by the certification agency - Bureau Vista - prior to being used here in New Zealand. Once it has been approved for use here, each car seat will have a yellow compliance sticker applied. Note: If you buy a car seat in America, it won’t be compliant for use in NZ. Even if the exact same model can be purchased here, one bought in America won’t have the required compliance sticker and therefore isn’t legal for use in NZ. 4. You won’t often see the Japanese Car Seat Safety Standard here. It is only approved in NZ for child restraints that are built into a vehicle – eg a built-in booster seat that can’t be removed from the car. Note: If the car seat standard sticker falls off, or is no longer able to be read (this could be because a car seat is old and has expired), the restraint is not compliant, and therefore it is not legal for use on our roads. I’m Visiting NZ – Can I bring my own car seat? When visiting New Zealand from overseas you can bring your own child restraint only if it carries either the AS/NZS 1754 or the ECE R44 / R129 safety standard sticker.
Learn more
Newborns & Sleep: What to Expect and Survival Tips
Bringing a new baby home is one of life’s most beautiful - and exhausting - adventures. In this blog, Family Sleep & Wellness Coach, Lauren Moran from Little Dreamers, shares her expert advice on newborn sleep in the fourth trimester. With a warm, realistic approach, she helps parents feel empowered, informed, and supported through those early weeks, offering practical tips for creating a nurturing sleep environment and caring for yourself, too. Newborns and Sleep By Lauren Moran from Little Dreamers https://www.littledreamers.co.nz/ Instagram: @little.dreamers.nz Congratulations parents! Whether this is your first or fourth bubba in your beautiful family, there is so much that can still feel overwhelming (or it’s a memory you’ve blanked out from last time!), but we are here to reassure you in those early days. Also known as the fourth trimester, those first 12 weeks following birth while trying to navigate your baby’s feeding and sleeping patterns can be quite the whirlwind. This blog is designed to help empower you, educate you, and normalise newborn sleep so that you feel confident to understand and support your little love. Let’s start this journey with “there is no such thing as bad habits when it comes to supporting your baby”. Yes, you heard that right! No such thing. Forget what social media, society or family/friends tell you. You do what works best for you and your family. There may come a time when those ways no longer work for you, which is totally fine, and we can change that. As you step into this new season remember you are nothing short of amazing and your little one is lucky to have you. Sleep is not only a necessity for your baby, but also you! We all need it. Sleep enables the body to repair itself, replenish those energy levels and regulate brain functions. When I have had more sleep, I feel like a better person showing up for myself and my family. It positively impacts our emotional and physical well-being too. So what can you expect in that fourth trimester? It is a busy, yet wonderful whirlwind of events that can bring about so much change both physically and emotionally. Feeling like you need to just cry? Go for it! Don’t know why? Many of us don’t! Your littlest love is adapting to life earthside and you are recovering from growing them and bringing them into this world. Offering love, care and comfort is exactly what’s needed for you both. With emotions running at an all-time high, it is important to focus on yourself too. I vividly remember my post-natal midwife coming for her first appointment and the first thing she said was that she was there for me. As a first-time mum I was slightly confused as I thought she would be looking at my daughter and making sure she was okay – and she did just that, but also had her focus on me. It is incredibly important to prioritise self-care during this time. That fourth trimester can be so overwhelming so making sure you prioritise your own body and mind will be key. It certainly may come with a feeling of guilt, just know that these are all very normal feelings & thoughts. Self-care is a necessity, not a luxury, for you both. So what can you focus on in the early days in terms of sleep? Let’s start with sleep environment. Laying some healthy foundations from the get go will not only aid in easier settling but also support your baby to stay asleep and get those much needed zzzz onboard: ● Darkness - When our little one enters a dark room, their bodies start to produce melatonin (sleepy hormone). This hormone is produced in the pineal gland and fluctuates throughout the day and night. Ensuring a dark sleep space will help your baby flood themselves with sleep hormones and support settling and restorative sleep periods. ● White noise - This is a fantastic tool to use within their first 18m of life. It replicates those sounds heard in the womb, which in those early days bring them safety and comfort. It can also drown out any noises outside the bedroom that might startle or wake them. It also creates a consistent sleep environment and positive sleep association for them when building on your sleep shaping. ● Temperature - Keep the room a good temperature so that your little one isn’t too hot or too cold. Check this guide on dressing your little one depending on the temperature of the room. The temperature often drops around 3 or 4am and can often be a reason our little ones wake around this time. Feel like you’ve nailed the above and bubs still doesn’t want to sleep in their cot/bassinet? We get it. And this is totally normal and expected – it’s different! Embrace those newborn snugs, strap your little one to you, be nap trapped, find a good series to watch, feed them to sleep, rock them, pat them, and swap out with the support around you if you need to. Your smell, heartbeat, skin feel and voice is their safe place of comfort (and of course it would be!). Spend those first couple of months getting to know your little one and understanding those hungry cues, tired cues and awake windows. Newborns won’t be able to settle themselves consistently until closer to 4 months old so contact and assisted naps will be your best friend. Your little one will rely on you to support them and assist them in getting to sleep. Setting up the right sleep environment will be key when you’re ready to begin supporting them in their own sleep space. Start one step at a time. Awake windows and tired cues Are they under tired, overtired or just hungry? Understanding these windows and cues will be key in having a more settled baby and parent! In those early days you will find those awake times are mostly spent feeding with a small gap at the end for a burp or eye-to-eye contact with you. An awake time is from the moment your baby wakes through to the moment they are sleeping again. Awake Windows in those first four months can look like: 0-3 weeks: 45 – 60 minutes 3-6 weeks: 1 – 1:15 hour 6-9 weeks: 1:15 – 1.5 hours 9-12 weeks: 1.5 hours 12-16 weeks: 1.5 – 2 hours Once your little one is nearing 4 months old you can look at a basic routine rather than awake windows. Our 4-7 month routine guide is perfect for this. You will see that awake windows get longer as our little people’s sleep needs change and this will depend on baby’s age, time of day and whether they are going through a nap transition. In those first 6-8 weeks it is normal to see a later bedtime as our little one’s circadian rhythms don’t mature until closer to 4 months of age (meaning that they don’t understand the difference between day and night) and they may be cluster feeding to get those calories in before bedtime. Being proactive and offering sleep before they get overtired is a great win. They are signs your little one is letting you know it is time to start winding down and getting ready for some sleep before they become overstimulated and enter a state of hyperarousal. Let’s have a look at some tired cues to watch out for: ● Clenching hands into a fist ● Pulling at their ears or hair ● Jerky or shaking movements ● Yawning ● Rubbing eyes ● Vacant look/staring into space ● Quieter/less chatty ● Grizzling ● Sucking thumb/hand Feeding and partner involvement Whether you’re choosing to breastfeed, bottle feed, formula feed or mixed feeding, it’s a journey! During those first 2-3 months your little one will look to feed whenever they can. This is what is commonly known as ‘on-demand feeding’. And it is just as it sounds – feeding your baby when they are showing signs of being hungry. What does this look like? ● Feeding every 2-3 hours (time starts from the start of a feed) can encourage them to consume more calories during the day and can reflect in longer overnight stretches of sleep ● Feeding on demand will help to establish breastmilk supply (if breastfeeding) ● If bottle feeding, follow their cues as volumes of milk will change as their needs change Babies are really great calorie regulators so you don’t need to worry about over-feeding them. In those first 4 months your little one will feed frequently which can be very time consuming. They still have little tummies so the capacity to stay full for long isn’t quite there, and they may wake frequently to feed. How can non-breastfeeding partners support routine and settling? Research now shows that a non-breastfeeding partner’s role in supporting breastfeeding and home routine can be a game-changer! Figuring out how to tackle the day and night time as a dynamic duo can help your breastfeeding partner to feel more rested, and help you as the non-breastfeeding partner to feel actively involved in your little one's care. As we got into the thick of feeding with our second, my husband inspired me with how he showed me he was there with me through this: ● Dinner preparation & cooking ● Getting the bath ready for child 1 & 2 ● Supporting the wind down routine ● Doing the initial settling for bed after a top up feed ● Burping the baby ● Changing nappy in between feeds ● Turning the night light on overnight Don’t underestimate the power of a small act of support in those early days. We have a whole blog around partner support that is a great read! However you choose to support your littlest love earthside is nothing short of amazing. There is no wrong way to support them and if what you’re doing is working for you, then great! Don’t change a thing! Remember that there are no bad habits when it comes to loving, settling and reassuring YOUR little one. You are doing what works for you that is calming, comforting and reassuring to them. Babies can build on these and rely on them as associations to go to sleep get back to sleep but rest assured, these can be changed if they are no longer working for you in the future.
Learn more